Gas line trenching requirements for Colorado contractors. Following these guidelines on your next trenching project will not only make it “gas line friendly” but will save time, money and keep the gas line installation code compliant. Having the proper trench will eliminate costly return trips, wasted man-hours, work delays, and inconveniences to your customers.
We have included pictures to help clarify the guidelines for these gas line trenching requirements that will allow the trench to be completed the first time correctly.
1). Call 811 for locates
It’s the law. Remember, they only locate service lines. All private lines need to be located through a private locator. 811 services require 3 days, not including the day you contact them before you start digging.
- All trenches must be 24” deep the entire length and level at all riser locations with no rocks or debris that can damage the pipe in any way. When back-filling, be sure to use clean back-fill material.
- Under certain conditions, the gas line must be installed in a sleeve for additional protection. We ask that you inform your estimator of any concrete that will be poured or any location where the underground line may be subjected to additional weight like a driveway.
- When back-filling a riser, please take extra time in making sure the riser is straight and plum.
2). Let’s start at the gas meter
This is a standard residential gas meter. Note that the gas service line feeds from underground on the left, and the house line enters the dwelling on the right. There are a few limited cases where this is reversed. If you take note of where the regulator is above the riser coming out of the ground, you can then locate the correct location for your trench. The trench always goes on the opposite side from where the Gas Service will go.
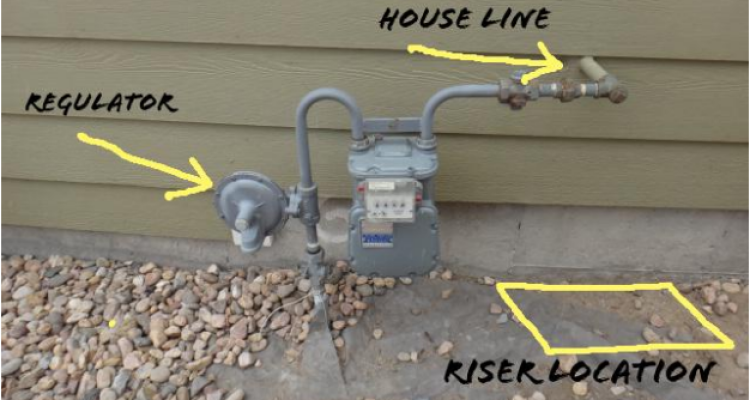
Xcel will not allow a gas line to be stubbed in front of the meter or within 12” of the high-pressure gas service line coming up out of the ground which goes into the regulator and then into the meter. Be aware that Xcel’s service gas line could have 150# of pressure or more so stay completely away from it. Always trench to the opposite side of the gas meter where Xcel’s service line is coming up which means 99% of the time the trench should be on the right side. Remember the closer the trench comes to the house the closer the riser can come up next to the house which means a much better-looking piping connection at the meter.
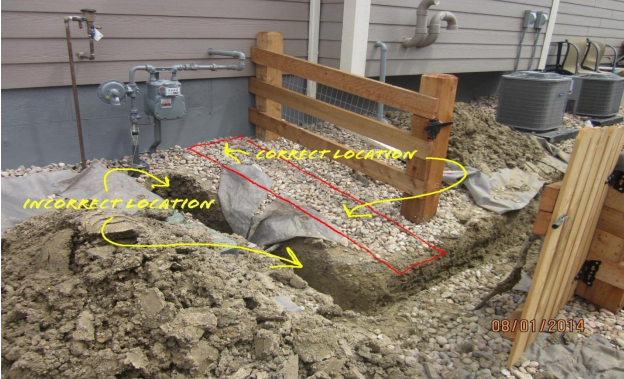
This is an example of an incorrect trench location with the correct location drawn in red. This is WRONG, WE CANNOT pipe to the high-pressure side where Xcel’s line comes out of the ground. Tie In should look more like the picture below.
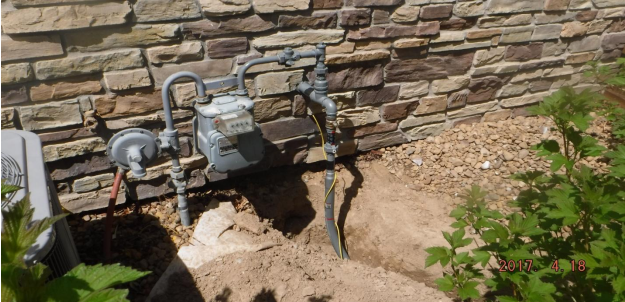
Correct location of the trench for the tie-in at the meter
3). Sweeping turns are the best and reduce the number of underground fittings.
When 90-degree angles are unavoidable where a riser will be installed then make sure the trench is at least 4’ long so the 4’ riser can lay in the trench and then make the 90-degree turn. Having a tee in the underground line for additional gas stubs should not be installed where concrete is going to be poured above it. The additional stub locations should be at least 4’ from the main trench so the 4’ horizontal part of the riser can lay flat and not put undue stress on any fittings.
If an additional stub has to be in line with the main trench then the trench needs to be widened at least one foot for at least 6’ allowing for a horizontal tee, a 90-degree elbow, and a riser to be installed.
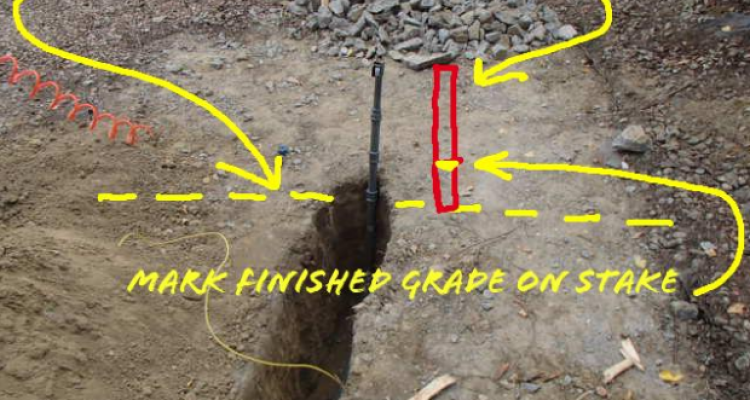
It is the trenching contractor’s responsibility for identifying the location and end height for the riser. It is required that a stake identifying the end location of the riser as well as a clear marking on the stake to show finished or final grade at that location. Failure to correctly mark the location could result in a return trip charge should we be requested to return to move the riser location. These gas line trenching requirements should help prevent that.
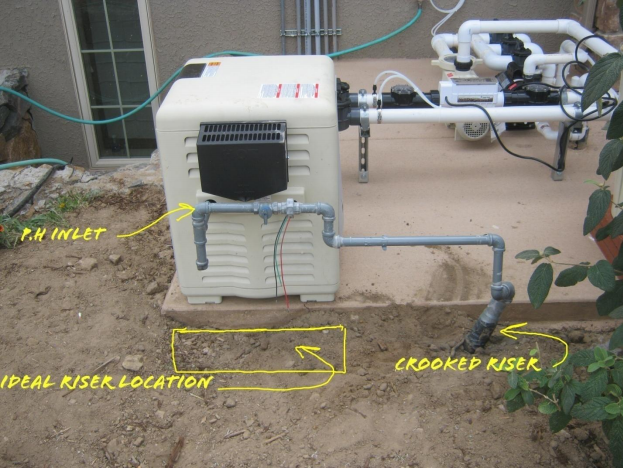
When piping to the pool heater, every attempt should be made in the planning stages to locate the riser as close as possible to the pool heater inlet so we can reduce the amount of the steel pipe run to reach the inlet. We cannot pipe in front of either access door, so the location of the inlet in relation to the riser is important. Excessive above-ground steel piping may incur additional time and material charges.
Examples of Correct Trenches
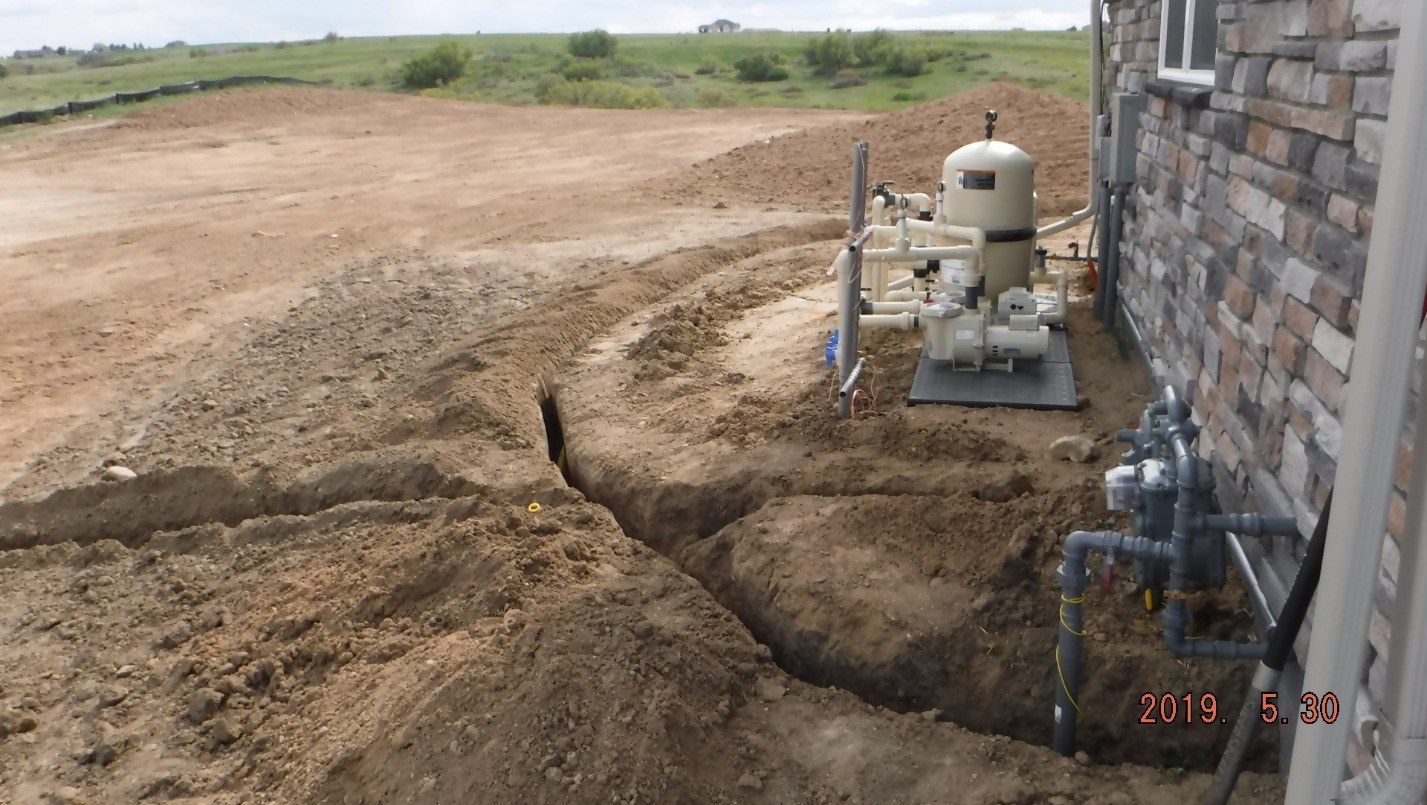
Correct side of meter with the gas line sweeping around to back yard
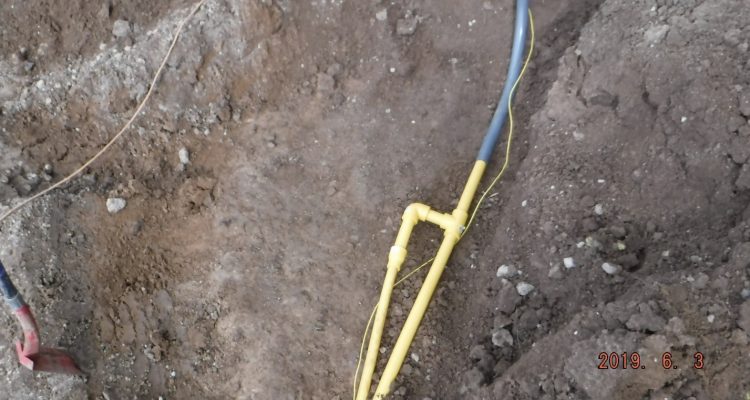
In-Line tee needs to be kept horizontal: Need minimum of a 12” wide trench
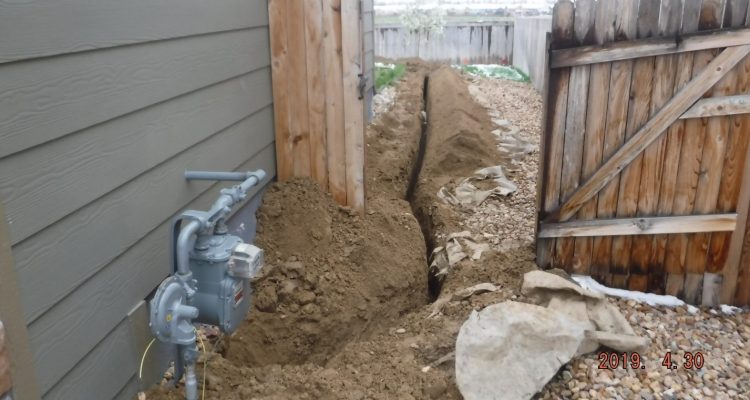
Correct: The trench is on the opposite side of the Xcel’s high-pressure line. The trench has a minimum of 4’ for the riser to be installed then sweeps to the backyard with no 90-degree turns.
Request Your FREE Consultation Today!
Fill in your information below to get in touch with The Gas Connection. We typically respond to most inquiries on the same day. Additionally, you can call us at 303-466-4206